Roasted Pepper and Acorn Squash Soup

What you’ll need:

3 red bell peppers, chopped

1 acorn squash, peeled, chopped

2 pounds organic ground beef(or bulk sausage if not doing GAPS)

1 onion, chopped

1 carrot, peeled, chopped

1 parsnip, peeled, chopped

3 celery, washed, chopped

2 tblsp minced garlic

6 c Homemade chicken stock

2 c filtered water

1 tblsp smoked paprika

1 tsp Celtic sea salt

1/2 tsp black pepper

Pinch crushed red pepper

Avocado oil, optional garnish

Directions

Set oven to 400*F. Line sheet pan with baking mat or parchment paper. Add chopped peppers and acorn squash. Toss with avocado oil and sea salt. Bake for 35 minutes. 

In dutch oven soup pot, add beef(or sausage), onions, carrot, parsnip, celery, and garlic. Cook till vegetables are tender. Add homemade stock, water, sea salt, black pepper, and crushed red pepper(if using). Simmer for 15minutes and add roasted veggies and simmer for another 10 minutes. 

Serve with a drizzle with avocado oil for some extra healthy fat and enjoy! 

I made this for the family and it is such a major hit! The acorn squash sorta disintegrated into the soup, not that anyone minded really. It flavorful and satisfying! Now, you can make this without meat and use an immersion blender to make it a creamy soup. Serve with some toasted pecans and a little coconut milk on top. Or just eat it as is, it’s a yummy soup no matter how you fix it and definitely a keeper. 

An Update and Recipe

Afternoon everyone!

Been a while since the last post, a lot has changed. Before I get into that, please keep Florida in your thoughts and prayers. I have family and friends who are hunkering down for various reasons and naturally we are worried about them. 

About a month ago I started doing the anti-candida diet. Started out great, lost 10Lbs of bloat that first week everything was awesome. A week later I had gained a pound and the week after that I was up another two pounds. Very discouraging. 😠 That’s when I started reading about the underlying cause for my candida issue…leaky gut. This wasn’t a new topic for me, I had read about, talked about, and even listened to numerous discussions about leaky gut syndrome with it’s laundry list of issues that come with it. Yay me! πŸ˜’

So, what’s the go to protocol to treat leaky gut syndrome? GAPS Diet. Gut and Psychological/Physiological Syndrome Diet, it’s designed to help those with leaky gut issues and those who are autistic, have ADD/ADHD, are schizophrenic, and have skin issues such as eczema and psoriasis. It is certainly good for a whole host of other issues as well, especially candida. My mother is currently living with fibromyalgia and suffering from side effects after taking Cipro(she’s been floxed), last night was her first time trying one of my GAPS soups and it was a hit(will share it in another post). 

Currently I have completed two weeks of the GAPS Intro stages 1 & 2. There are six stages in this intro diet and it is not for the faint of heart. I first started out almost immediately with cold like symptoms. I was miserable, cold, coughing, unabel to sleep lying down, beginning to doubt my decision to go stage by stage. Typically beginners are encouraged to do the full GAPS Diet which allows them to eat everything from all six stages and it eases them into it rather than eliminating everything all at once. I was unaware of THAT tid bit of information until I was already halfway through my first week. No matter, I pushed through the first week proud that I had stuck it out. 

You see, I have a lot of food issues. Dairy is usually a biggie for me, eggs, and gluten. This is why I tend to shun such foods and tend to miss out on a lot of low carb treats. For me, going stage by stage is helping me to identify where my real issues are. I’ll break it down…

Stage 1 was not fun, easy but not a walk in the park. Most of what I was allowed to have that first week was homemade stocks, overcooked vegetables, boiled meats, and could only season with salt(either Himalayan Pink or Celtic). Not that exciting. I was developing a sore throat from all the coughing so I drank a lot of warm lemon honey water. I won’t lie, I was miserable since I couldn’t take cough meds because of the alcohol, cough drops were out of the question due to the sugar. I sounded rough and could not wait to get into the second stage. 

Stage 1 meals:

Chicken & Vegetable Soup–basically boiled chicken, homemade stock, carrots, leeks, minced garlic, and Himalayan Pink Salt to taste.

Beef and Vegetable Soup–grass fed beef & stock, leeks, carrots, zucchini slices, minced garlic, and Celtic Sea salt.

Turkey Meatball Soup–homemade raw turkey meatballs, chicken stock, yellow squash, zucchini, leeks, minced garlic, and Himalayan Pink Salt.

Mexican Turkey Soup–chicken stock, half head of cauliflower(destemmed), small onion, oregano, minced garlic, 4oz jar green chiles(big mistake on my part) turkey meatballs, and Himalayan Pink salt.

Stage 2 came and the first thing I made, without even trying, was an egg drop soup. I had been reading about how onions and eggs help with sore throats so I got busy eating lots of eggy onion soups those first few days of that second week. It. Was. Divine! Sweet relief for my throat. By Wednesday I was finally feeling somewhat normal and began including bovine gelatin to my soups. 

Stage 2 Meals:

Egg Drop Soup–chicken stock, a small onion chopped, an egg yolk, minced garlic, ghee, and Celtic Sea salt

Warm Chicken Stock-just warmed up chicken stock with Celtic Sea salt for flavor(very soothing)

Turkey Vegetable Stew–ground turkey meat, ghee, zucchini and yellow squash slices, leeks, Celtic Sea salt and bovine gelatin

Italian Meatball Soup–beef meatballs, carrots, onions, celery(not stage 2 legal, I know), minced garlic, beef stock, chicken stock, diced tomatoes, Celtic Sea salt, ghee, coconut oil, and avocado oil(family loved this!)

Now As I approach the third stage I am prepping for a little bit more food options such as: boiled and scrambled eggs, fermented foods like sauerkraut(in small doses), fully cooked vegetables that aren’t boiled in stock, and add some new organic vegetables to my menu. The one thing I’ve started doing is taking a drop of organic kraut juice in the morning. Wicked stuff, I say that because I’m not a fan of fermented things anyway, especially sauerkraut. πŸ˜‘ BUT it’s a must since it’s good for digestion. 

And I decided to try pancakes this morning. These are most likely NOT GAPS stage 2 legal since I chose to use coconut flour instead of butternut squash and a nut butter as the base of my pancakes. (Original recipe for these coconut flour pancakes is here.)


What you’ll need:

1/2 c coconut flour

3 tblsp favorite granulated sweetener–I used about 4 packets of Naturevia)

1 tsp baking powder

1/2 tsp finely ground Celtic Sea salt

6 organic eggs

1/4 c coconut oil, melted

3/4 c sparkling mineral water

Coconut oil for cooking

Directions:

Heat griddle over medium heat, just until you’re ready to cook. 

In a medius bowl combine coconut flour, granulated sweetener, baking powder, and sea salt. Add eggs, coconut oil, and mineral water, whisking vigorously until well combined. Let the batter sit for a few minutes to thicken up. Use 1/4 cup of batter per pancake, should yield 12 pancakes. Add a little coconut oil to the hot griddle and add batter. Reduce heat if needed so nothing burns, little bubble will form on top and the edges will dry a bit. That’s when you’ll know they’re ready to flip. 

I ate mine with a thin spread of ghee and a drizzle of raw unfiltered honey(since it’s GAPS approved). So far I’m feeling ok, still full but no discomfort. Will see how I am by tomorrow, please don’t follow my example if you are not sure exactly how coconut flour is going to affect your system. We’re all different, but if you are further along in your GAPS journey then I hope you will enjoy these pancakes! 

This whole experience has been a reeducation of not looking at certain foods as “I can’t have that because of the carbs”, but rather, “I’ll have a little because I do need some carbs but not the entire serving.” Since starting all of this I’ve dropped 19 pounds and obviously everything is working out smoothly. My die off is at a manageable state, my guts have quieted down more, there’s less churning and gurgling without the cramping discomfort. 

I will not be making these pancakes too often, as much as I loved their fluffy goodness! Definitely a keeper πŸ‘πŸΌπŸ‘πŸΌ Even G liked them! 

If you do give these a try let me know what you think, feel free to share this recipe with others, and reblog if you like! I have shared certain GAPS recipes on on my IG account(nok_amandagayle), but I will be moving those recipes over here so everyone can have access to them. 

Have a blessed weekend! 

Maple Turkey Sausage Patties(LC/DF/GF/SF)

Afternoon all, trust everyone has recouped from the after effects of watching the solar eclipse yesterday. I know a lot of folks were complaining of having headaches, eyes were burning, and feeling tired. If you’re still not feeling well I pray for speedy recovery soon, I know how draining those types of headaches can be. 

Yesterday I spent some time, post solar eclipse, making some breakfast meat for myself. I love maple flavored sausage, especially with extra maple syrup drizzled on top…mmmmm, the best! But carb wise it’s like the plague attacking my body, which is why I haven’t had that in quite awhile. I do miss regular sausage though…and bacon, deli ham, spam, kielbasa…πŸ˜‘I’ll stop. (Le sigh)


Most of what’s available in stores I can’t even trust. There are hidden sugars, preservatives, and msg in almost everything. I’m not being as strict with my anti-candida lifestyle as some folks have suggested. I still eat meat whereas others tend to become vegetarian. Nothing wrong with that at all, I personally cannot go without meat, which is why I think such things ought to be tailored for each person. There is no clear cut and dry protocol that will work for everyone. I’ve learned a lot in the last few weeks about the various candida protocols and have taken from each one customizing what I think will work best for me. So far, everything that I’ve been doing is helping and most of the die off on my chest has cleared up. PTL!! Since I have to resort to making my own breakfast meats, desserts, and meals, it does take a little extra time and effort, but the end results are worth it! 

I do want to mention that the maple flavoring is optional, I only added it because I personally LOVE it. πŸ˜πŸ˜‰ However, you can use maple syrup if the carbs are not an issue for you. Ground chicken can also be used in lieu of ground turkey. Or you can mix ground turkey with ground hamburger, which I’ve done in the past when making meatballs. It’s just as good and the ground beef lends some fat to the mixture since ground turkey tends to be lean. 

What you’ll need: 

1 pound ground turkey

2 tsp poultry seasoning

2 tsp maple extract(optional)

1 tblsp granulated stevia(optional)

1/8 tsp marjoram

1/2 tsp black pepper

1/4 tsp nutmeg

1/4 tsp Cassia cinnamon(purchased from The Spice House)

1/8 tsp red pepper flakes

1 tsp Himalyan pink salt

Coconut oil, for cooking

Heat oven to 375*F, line sheet pan with parchment paper and set aside. In a medium size bowl mix all the ingredients by hand thoroughly. There are a few methods with which you can make sausage patties. METHOD 1: on a clean work surface place a piece of wax paper down and add half of the meat mixture on it. Cover with another sheet of wax paper, then use a rolling pin to flatten out to desired thickness. Cut into 8 rectangular pieces and repeat with second half of mixture. METHOD 2: skip the wax paper all together and free form patties by hand. METHOD 3: on clean work surface lay down wax paper, place half of the meat mixture down and flatten out with hands to desired thickness. Use a biscuit cutter cut to shape the patties. Repeat with second half of the meat mixture. Cook in coconut oil over medium heat until browned on both sides. 

You can freeze these raw or cooked, I went ahead and cooked all of mine up to help cut down on my time in the kitchen each morning. I used wax paper to keep the patties separated and put them into a quart size freezer bag. 

Depending on the size and how thick or thin you make the patties will determine how many it yields. I was able to get 16 rectangular patties. The carb count for these is basically non existent. Using maple syrup would change that, so keep that in mind. If you decide to make these with maple syrup just remember to omit the granulated stevia. 

I had three this morning with a couple of egg muffins that I made, such a nice carb free meal! 

(Pictured above: Half of the egg muffins are dairy and meat free for me. The other half have ham, pepperoni, and mozzarella cheese which are G-Man’s fave!) A simple and easy low carb breakfast that you can customize with any flavor and add ins. These were really fluffy, the almod milk added a nice light texture to these. I used cajun seasoning, turmeric powder, kosher salt, dried oregano, and dried parsley. Gave a good whisking and portioned it out to all the silicone muffin cups. Baked @375*F for 20 minutes, plan to make more to freeze. I love breakfasts that I can grab and warm up. Makes for a hassel free morning. 

Hope you give these sausage patties a try, play around with the seasonings and let me know what you think. I love getting feedback from you all! If you have any questions please email me at nightowlkitchen@yahoo.com. You can also follow me on Instagram: @nok_amandagayle, for more recipe ideas/inspirations. 

Have a blessed week! 

My Life with Candida Albicans(Here I Go Again)

Afternoon everyone, hope your Wednesday has been a blessed one so far. Today I want to share an update on my candida detox, plus an article I just found that explains what foods to eliminate when you suspect you have a candida overgrowth, and a recipe that I made a couple of nights ago that was absolutely delicious and dairy free! So this will be a jam packed post, but bear with me! ☺️ Below is a picture that is NOT the most flattering, but it shows just how bad this mess has gotten. 

Picture from Sunday night. It spans from shoulder to shoulder, the worst of it in the center. It’s still creeping slowly up my neck, but for now it’s not as bad as it was last Wednesday. As of today, it only itches around the edges of the rash site. There is a soap I found that I plan to try, it’s designed for these areas so I’ll share more after I give it a go. 

For a while now I have been dealing with this candida overgrowth and die off. Ever since my first die off from a few years ago I have done just enough to get over the worst of the symptoms and once the die off would clear up I would slowly begin to add certain foods back into my low carb diet. I can already hear the clucking of tongues from certain folks πŸ˜‰, trust me I have been kicking myself since last week for not having realized sooner how detrimental that decision was to my health. Just like low carb/keto is more than a diet, it’s a lifestyle, so is eat to keep your candida in check. And yes, EVERYONE has candida in their bodies. It’s a nasty bacteria in your digestive system and when we aren’t eating right, when we are pumping our bodies full of antibiotics(including the animal meats we eat) we are feeding the candida. That’s when things get out of balance and we start having issues with our sinuses, allergies, skin related problems(ie rashes, eczema), flatulence, brain fog, IBS, fibromyalgia, yeast infections, and so on. It just seems to snowball and we can’t figure out why all of the sudden we are having all these issues. 
That’s been my life now since 2011 and quite possibly longer if I think about it. This could explain my most recent issue with the top of my left foot. It was hurting to the point where I could barely walk. Which that has actually started to improve over the last few days! I’m not hobbling around as much and I can stand for short periods of time with minimal issues. This is great news since this means I will be able to get back to my workouts! 

So what is it EXACTLY am I doing to improve my health? What protocol am I following to eliminate the candida overgrowth? It’s not any one thing or method. I spent last weekend reading anything and everything online, refreshing my memory of what needs to be done. The first thing I did was change my diet. Since I am already living a lower carb life, I knew I was going to have to give up more even MORE foods that may have been contributing to the overgrowth. And Saturday night proved to be a near breaking point for me. I was emotionally drained and frustrated by the realization that I would have to give up a lot of my favorite low carb foods for a while(possibly forever) and it all hit me that night. I was hungry and wanting stuffed green olives. My go to snack food when I have the munchies. High in fat, zero carbs, and I can easily eat half a jar! No judging. πŸ˜’My 13 yr old comes in and asks me what I’m doing. Trying to keep the shreds of emotions in check I tell him I’m hungry and can’t have the things that I would normally go to. At this point I could feels the tears welling up and I absolutely hate crying in front of people. When I cry it’s messy and ugly, so I took a few breaths to calm myself and without skipping a beat G-Man told me “so fix yourself some eggs.” 

I won’t lie, I scoffed at that idea. For one eggs don’t like me. Honestly, they make me sulfur gassy(and there goes any hope for finding a future husband). Before I could stop him, G-Man was already grabbing the container of eggs and asking me what meats and veggies I can have. He was shocked when I told him I can’t have sausage patties, deli ham or turkey, and no more bacon. Pitiful, I know. πŸ˜” So he grabbed tomatoes(which aren’t EXACTLY a safe thing but it added color to my dish), frozen green beans, and a green onion. He stood there watching me fry a couple of eggs in coconut oil with a handful of green beans, added in a few tomatoes for color, seasoned it all with Himalayan seas salt, black pepper, and turmeric. Garnishing the top with thin slices of green onion. And that was dinner! It was so satisfying, delicious, and simple! 

I know not too many folks like to give God credit these days, but I have to take a moment to. If my son hadn’t come into the kitchen when he did I wouldn’t have eaten such an amazing meal. I would have eaten half a jar of stuffed green olives, maybe some cheese slices, and hated myself later. God intervened by using my son to ground me (meaning forcing me to focus) and get me thinking what I should do instead and kept me from eating the very things that have led to this overgrowth and further the issue more. 

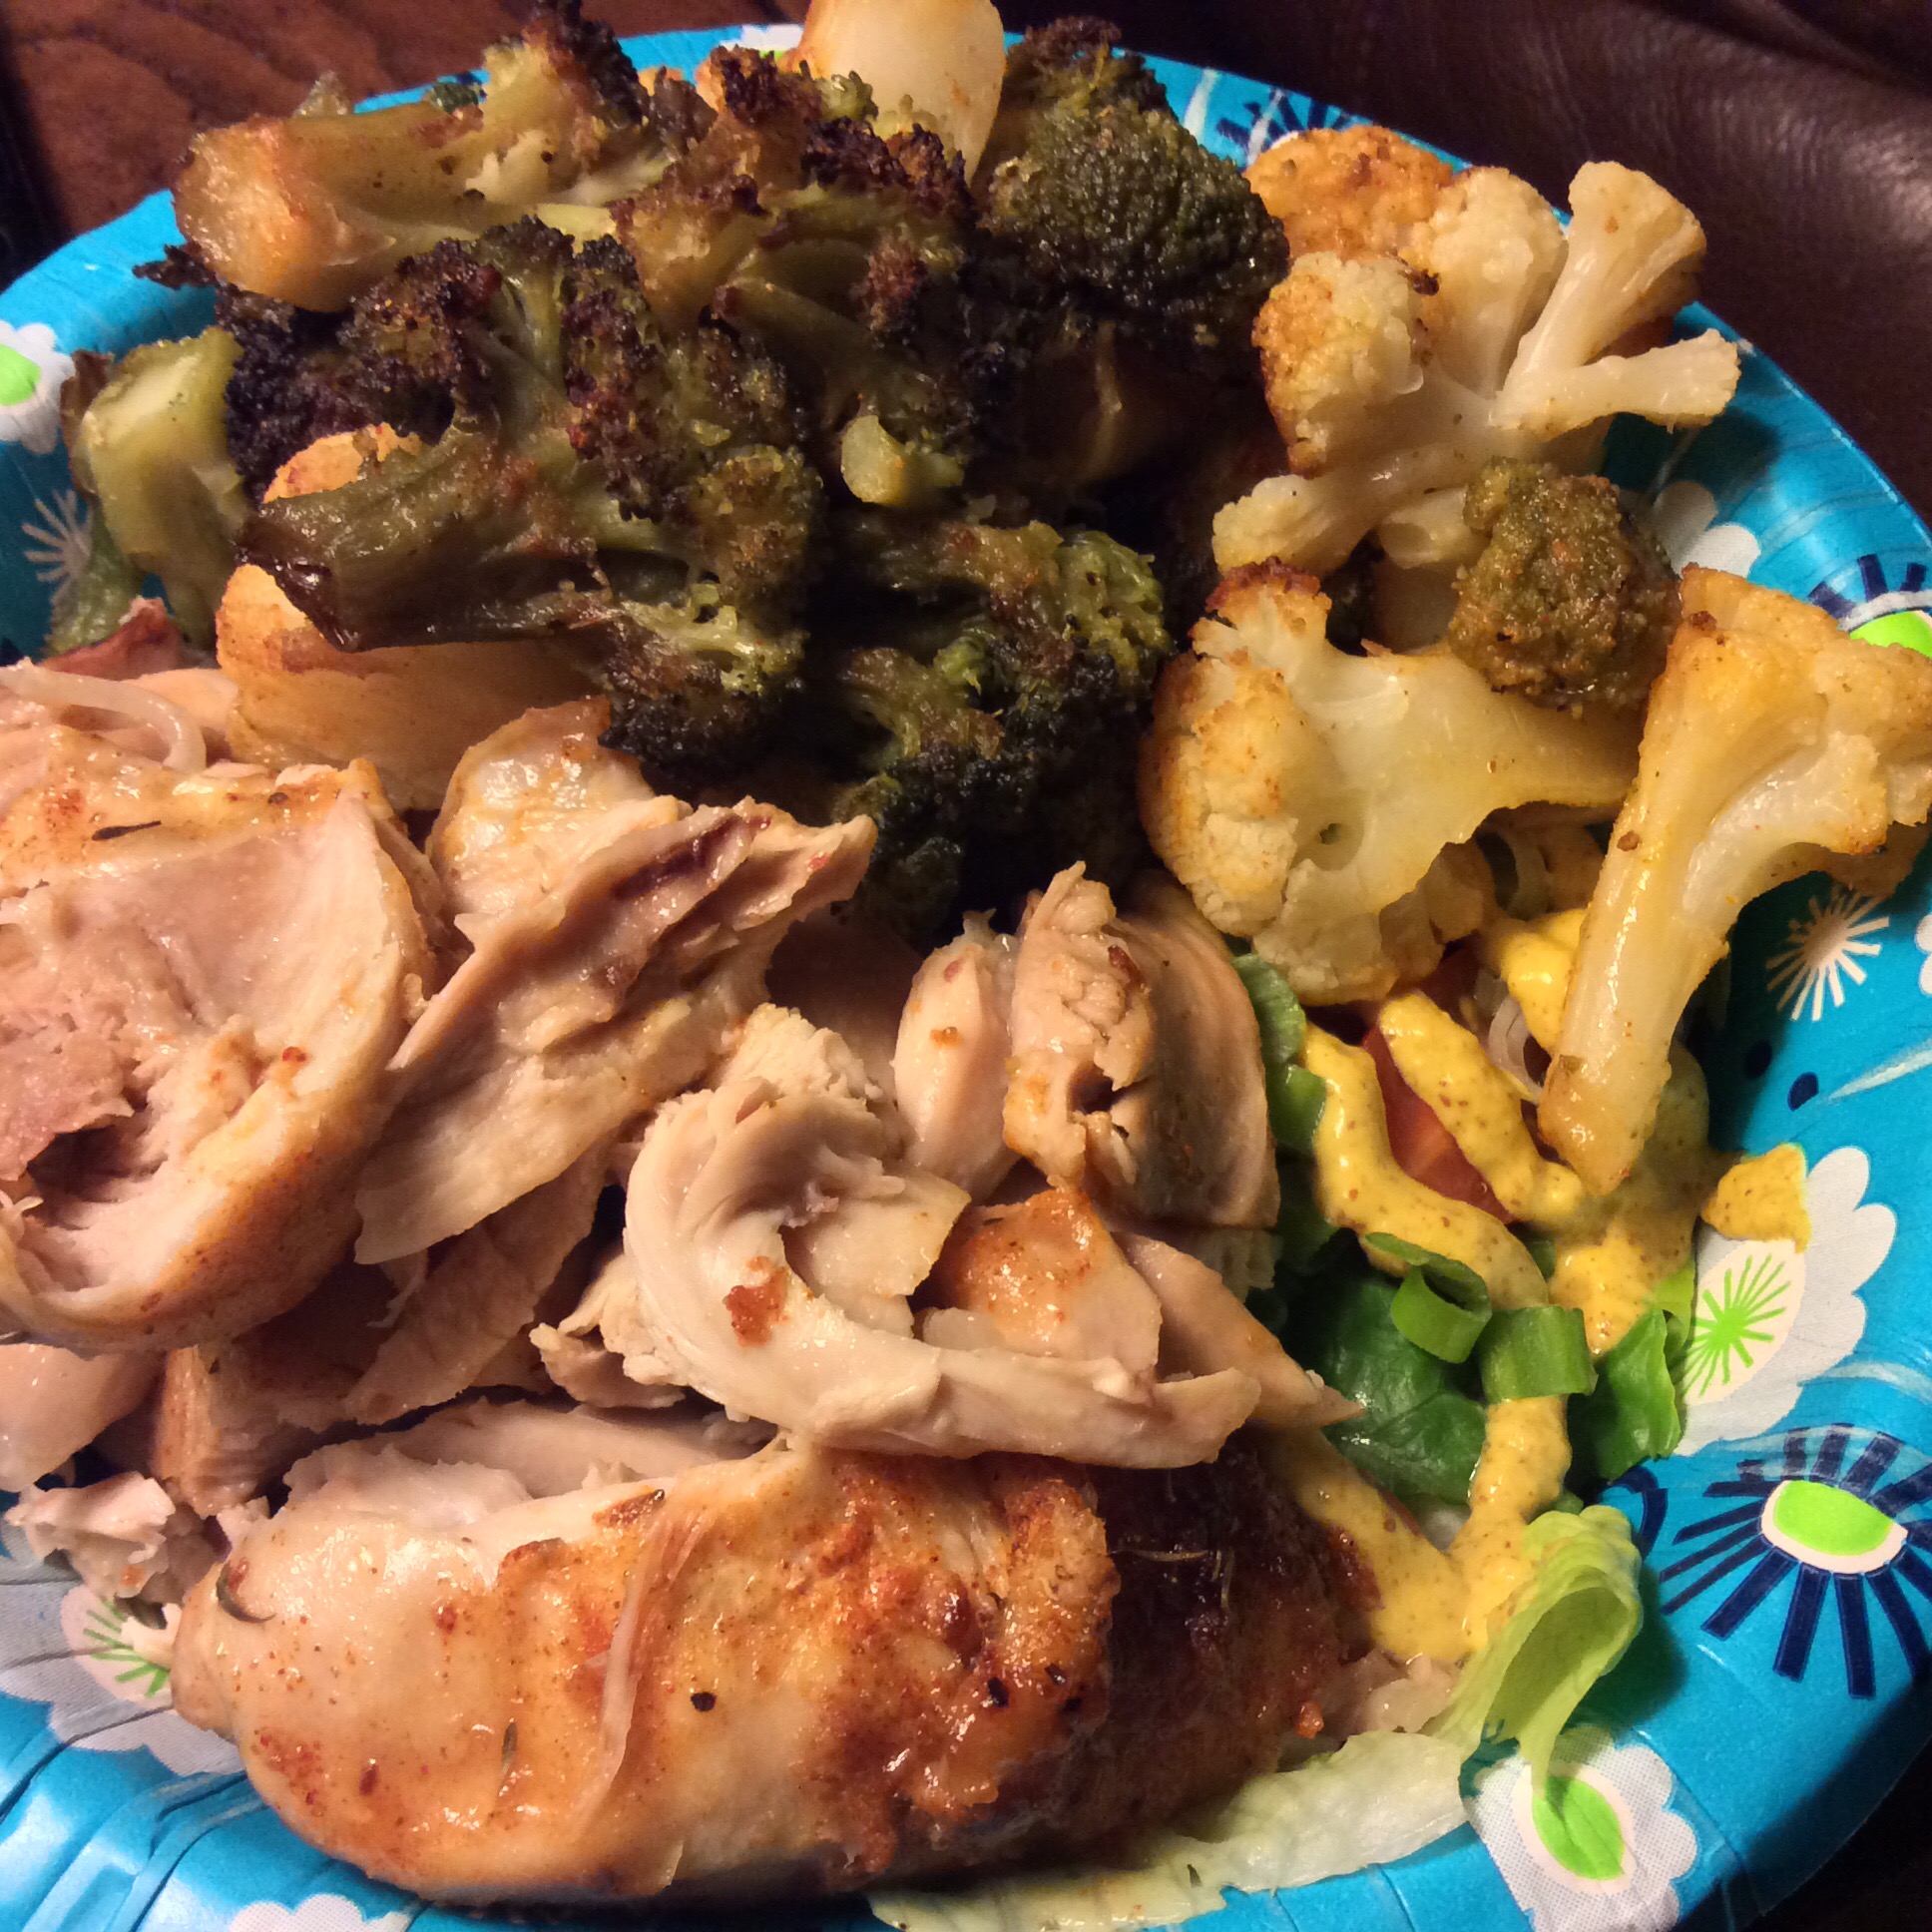
Sunday was even better! I had to make the decision to stay home from church since I was experiencing some IBS issues(again I’m just killing my prospects here lol) and didn’t want to chance anything. I rarely eat breakfast y’all, I take after my Memaw, leave me alone for an hour after I get up and let me enjoy my morning coffee(only for her it was hot tea). Coffee fills me up but I made half a cup instead and fried up two eggs just so I could get something into my system. Lunch came and I was starving! That’s when I made this…


All right, it’s not the prettiest bowl of food, but it was tasy! Stir fry veggies and garlic ginger chicken, it made four servings so I had enough for dinner and some to freeze! Sunday afternoon my detox pills arrived and I was actually excited! Me, I hate swallowing pills, but I was actually excited about having THOSE! I know, crazy. 😏 With my biggest meal I take my pills every day and haven’t had too many issues with them(mild burping…I’m batting a thousand already who cares anymore?!). And this is what is helping me to combat the candida overgrowth. I still pine for the foods that I used to eat, but I know in the end it’s better that I go without and finally get well after years of neglect. 

So…

Goodbye to : dairy(heavy cream, butter, cheeses, cream cheese), processed meats(kielbasa, spam, hot dogs, bacon, pepperoni, deli meats), mushrooms, peanut oil, mini sweet peppers, fathead pizza dough and bagels, creamy/cheesy casseroles, homemade ranch dressing, ketchup, mayonnaise, low carb brownies(because of the chocolate and butter), pork rinds, low carb protein smoothies(because the protein powder I love has whey in it), mashed cauliflower(I tend to make it with cream cheese, parm cheese, and heavy cream), pickled foods(sliced jalapenos, dill pickles, stuffed green olives), naturally sweet veggies and fruit, and the list goes on. 

Say hello to: dark green veggies(kale, broccoli, chard, romaine), cruciferous veggies(cauliflower, cabbage), organic meats(beef, chicken, and pork…not a fish fan), peppers, fermented foods(soy sauce, sauerkrauts, kimchi), squash, zucchini, green beans, onions, garlic, coconut oil, evoo, safflower oil, avocado oil(and avocados), hemp seeds, chia seeds, almonds, eggplant, blueberries, unsweetened cranberries, stevia, xylitol, vitamins and supplements, and candida detox pills(two pills once a day). 

Here’s a link to a site I found today that gives a basic outline of what foods to avoid and what foods are safe when killing off the candida. CLICK HERE

A friend recently asked me how my ice cube diet is going. 😏 I love her cheekiness! If it were anyone else I wouldn’t have laughed. For the most part I am able to maintain my low carb lifestyle while incorporating more of the anti-candida regimen. I don’t feel as bloated, the gas is slowly going away, mental clarity is emerging, I’m not as tired during the afternoon, but I am still battling with cold extremities, that might take a bit longer to get over since I’ve dealt with it for years. Plus I actually dropped a pound over the weekend which I haven’t been able to do for a while! 

Now, what yummy recipe do I have for you?! 


It’s baked chicken legs(you can use breasts, thighs, wings, or the whole chicken, go nuts!!) with oven roasted broccoli and cauliflower, served over a very basic romain salad topped with spicy brown mustard. 

What you’ll need:

12 chicken legs, skin on

No salt added seasoning of your choice(the one I used is pictured below)

Evoo

2 pounds frozen broccoli

1 pound frozen cauliflower

Pink Himalayan Sea Salt

Directions:

Heat the oven to 375 degrees. Line two sheet pans with non stick foil. Coat the chicken legs evenly with salt free seasoning and place on sheet pan. Bake for 40 minutes uncovered. Crank the heat up to 425 degrees and bake for another 30 minutes. 

In a large mixing add frozen broccoli and cauliflower. Drizzle on evoo and season with pink Himalayan sea salt. Spread out on remaining sheet pan and bake for 30 minutes or until it reaches a desired doneness. 

Serve with chopped organic romaine lettuce and use your favorite dressing. It’s simple, it’s easy, and leftovers are great the next day for breakfast with a couple of fried eggs. Leftovers can be frozen or used for those Bento boxes. Just make sure to debone the chicken first before storing. Makes it easier to enjoy later on! 

Below is the no salt added seasoning recipe I used. 


I store mine in a regular mouth glass jar and washed off a screw on lid from a Kraft Parmesan cheese container. This way I can shake on the seasoning on one side or measure it out from the other. I can’t remember if I doubled or tripled the recipe at the time I made this, but it is worth it! I use it on my eggs, veggies, beef, pork, and of course chicken. 

You can make a non-spicy version by leaving out the cayenne pepper. I think the next batch I make I’ll add turmeric and ginger powder since both of those are amazing anti-candida seasonings. 


If you have any questions please feel free to ask me below or email me at nightowlkitchen@yahoo.com, don’t forget to follow me on Instagram(@nok_amandagayle). I tend to post a little more frequently on IG these days since it’s quicker. But I hope this post has helped to shed some light on this growing issue. If you suspect you are suffering from a candida overgrowth, here is a link with a list of symptoms. CLICK HERE. This is definitely something you DO NOT want to leave untreated. I will be honest with you, there is a lot of controversial information out there, please be careful with your research and take a majority of it with a massive grain of salt. What works for one person won’t always work for another, there is no one size fits all protocol. There’s a basic outline that we all have to follow, but how I am approaching treatment is not necessarily going to work for the next person. 

In the meantime, take care, happy healthy eating, and hope you all have a blessed week! 

Holy Cow, LC/GF Brownies!

No joke, this is a great recipe and one that I was skeptical of! Y’all know I’m not a chocolate fan but there is that occasion when I do like a little something chocolaty, especially if it has peanut butter. These are perfect and turned out beautifully!

11245326_10153276565719605_1977353182_n

Fudgy Brownies–LC, GF, SF

Yields: 24
Prep Time: 10 minutes
Bake Time: 25-30 minutes

1 cup butter, melted
2 cups dark chocolate chips
2 cups almond flour/meal
6 Tblsp unsweetened cocoa powder
1 tsp baking powder
1 tsp salt
6 eggs
2 cups Stevia in the Raw
1 tsp real vanilla extract(optional)

Preheat oven to 350*F. Line 9×13 baking dish with release foil, set aside. In a large bowl melt butter and chocolate chips together in the microwave for 2 minutes. Whisk together to melt remaining chips, set aside.
In a medium bowl combine almond flour, cocoa powder, baking powder, and salt(I just used a pinch since I used salted butter). Set aside.
In another medium bowl add eggs, stevia and vanilla extract. Use hand or stand mixer and combine till mixture is a creamy lemon color. Pour egg mixture into the melted chocolate mixture. Use hand or stand mixture to mix completely. With a silicon spatula, fold in the dry ingredients. DO NOT STIR. You don’t want to kill the air you’ve incorporated already, be gentle and just fold the dry in slowly. Once everything is completely mixed together, pour into your foil lined pan and smooth out evenly. Bake for 25-30 minutes, or until the edges begin to pull away from the sides. You can insert a small sharp knife or cake tester into the center. If there’s a little batter on the knife that’s ok, these are supposed to be fudgy. Enjoy!!

These are to die for! The texture is lighter than the regular brownies I make(from the recipe on the Baker’s Unsweetened chocolate box), but that’s mostly because of the almond flour. Almond flour is so fine and light, even when there are tiny bits of almonds in the flour, the texture is still so light. Now, these are strictly a treat these are great with your morning coffee, for dessert, or even a snack! Pair it with your favorite low carb ice cream(if you are allowed to have any), enjoy with some strawberries on the side, or a tall glass of milk(unsweetened almond milk works too)!

Enough hype, what’s the nutritional info?! Get ready!

Calories: 148
Fat: 14g
Carbohydrates: 4g
Fiber: 2g
Net Carbs: 2g

HA! 2g net carbs per square! If you want to get technical it’s 2.2g but hey who ever counts the number after the decimal?! Yep, these are a keeper going into my tried and true folder πŸ˜€

Let me know if you make these and what you think about them! Hope you all have blessed day!!!


UPDATE::

Tonight I made these brownies again, only this time I used King Arthur Flour Bensdorp Dutch-Process Cocoa. It is the best cocoa I have ever used! 1 net carb for 1 tablespoon of cocoa powder. Which is the same as Hershey’s unsweetened cocoa powder. Thankfully there was nothing to recalculate and the results were absolutely amazing!


These are not eggy at all, they are a bit dense, and definitely fudgy! The perfect guilt free treat ☺️ Hope you all enjoy!

UPDATE!!!

If you would like to make these into cheesecake brownie squares, make the brownie batter as is above and before you bake it add this cheesecake mixture on top:

2 pkgs full fat cream cheese, softened

6 tblsp granulated stevia(or prefered sweetener equivalent)

1 tsp vanilla extract

2 large eggs

Cream together all the ingredients in a medium bowl and dollop the cheesecake mixture over the brownie batter. Take a butter knife and swirl the cheesecake mixture into the brownie mixture. Bake for 26-31 minutes or until cheesecake top is cracked and produces a slight jiggle. 

Cool completely before storing in the fridge covered. 

I made these for Father’s Day and they were a MASSIVE hit! The brownies alone are amazing but when you add the cheesecake topping to it, have mercy it just takes these brownies to another level of awesomeness! 

I did have to bake mine for 31 minutes, please note that every oven is different and test the center for doneness. I used a sharp knife and after 31 minutes the cheesecake layer was mostly set as was the brownie layer. Still a bit gooey which just adds tos the yumminess! 


Enjoy! 

Buffalo Chicken Thighs

This can be served with a salad or other vegetable of your choice. It is a crazy easy recipe with a few ingredients but is tasty with a bit of a kick! 


Buffalo Chicken Thighs

Yields: 4–6 thighs

Prep Time: 2 minutes 

Bake Time: 40–45 minutes

4–6 chicken thighs, with bone and skin

1/4 cup peanut oil or clarified butter

1/3 cup Frank’s Hot Sauce

1 tsp garlic powder

1 tsp onion powder

Pinch of salt

Preheat oven to 425 degrees. Depeneding on how many thighs your using it will determine yur pan size. For an 8×8 baking dish you can fit in 4 chicken thighs nicely. 7×11 will hold 6 easily. 

Pat chicken dry and very lightly salt the chicken under the skin. Set aside. 

In a small bowl whisk together the oil(or butter), hot sauce, garlic and onion powders. Spoon a little of the sauce into your baking dish. Place your chicken in the pan and spoon more sauce over it just to coat. The remaining suace will be used later. Bake for 20 minutes uncovered, turn chicken over and pour the remaining sauce over the chicken. Bake for another 20-25 minutes or until completely done down to the bone. The sauce in the pan can be used to garnish with if desired. 


And that’s it! You can eat it however you choose, the meat is nice and tender, and it’s not overly spicy. I had mine over a nice cool salad with cucumbers, sweet peppers, and dressing. I did drizzle some of the sauce from the pan over the chicken I cut up, it added a wonderful flavor to my salad! 

I made mention that recipe can yield six thighs because the amount of sauce that is used will be enough for up to six thighs. Since I was the only one eating this dish I just made four thighs and had plenty of sauce to use as a garnish with leftover thighs for a couple of meals! 

Nutritional Info for 1 thigh(based on yield of 4 thighs): 

Calories: 369

Fat: 33.5g

Carbohydrates: 0g

Net Carbs: 0g

Hope you all enjoy and have a very blessed day!! 

Rosemary Chicken and Veggies

Yesterday I tried to get this post up and my computer crashed on me and I lost the entire post. In this post there are two recipes, one for the chicken and another for the veggies. So here goes…

IMG_0212

Rosemary Chicken and Kale

Serves 2 (can be doubles or tripled)
Prep Time: 5 minutes
Bake Time: 1 hour

4 chicken thighs, with skin and bone**
Salt and Pepper
1 tsp dried rosemary or you may use fresh
1/2 dried basil
1/8 tsp red pepper flakes, optional
1/2 tsp onion powder
1/2 tsp garlic powder
Kale, chopped
1/2 large onion, thinly sliced and divided
Turmeric

Heat oven to 375*F. I purposely didn’t measure the chopped kale when I placed it in my 8×8 baking dish. I just filled it up to the top, don’t worry it cooks down πŸ™‚

IMG_0197(1)

Top the kale with half of the sliced onion. Sprinkle with turmeric if desired or other seasoning. I didn’t use any salt or pepper on the kale and onions. But if you choose to then it would be best to not salt or pepper the underside of your chicken. Set this aside.

IMG_0201 Β  Β  IMG_0205(1)

In a small prep bowl combine rosemary, basil, red pepper flakes, onion and garlic powder. You could also add thyme, sweet summer savory, and oregano. Set it aside and prep chicken with salt and pepper. Be sure to get under the skin as well. Place the chicken thighs on top of the onions and kale, sprinkle with rosemary blend and cover with foil. Bake for 30 minutes covered. Remove the foil and bake for another 30 minutes or until chicken is done all the way down to the bone. You can use boneless thighs, just lower your baking time accordingly(20-30 minutes works good for me). Let it rest for a few minutes before serving!

Italian Seasoned Vegetables

Serves: 6
Prep Time: 3 minutes
Bake Time: 25–30 minutes

1 16 oz bag frozen green beans
1 16 oz bag frozen cauliflower
Remaining onion slices from chicken recipe above
1/2 pack Good Seasons Italian Seasoning
Pinch of salt
Olive Oil

Prep a 9×13 baking dish with a drizzle or spray of olive oil. Bake in the oven along with chicken.

IMG_0207(1)

Dump the green beans and cauliflower into the pan. Add onion slices and toss together. Add a pinch of salt and sprinkle Italian seasoning over the veggies. Bake for 25-30 minutes until fork tender.

Nutritional Info for 1 serving of Chicken(2 thighs) and kale:

Calories: 269
Fat: 20g
Carbohydrates: 4g
Fiber: 1g
Net Carbs: 3g

Nutritional Info for 1 serving of veggies:

Calories: 42
Fat: 4g
Carbohydrates: 2g
Fiber: 1g
Net Carbs: 1g

Enjoy!!

Triple Berry Bake

Good morning everyone! I’m so happy to report that after one week of eating right and upping my level of activity I have lost 1 1/2 pounds!! The first of so many but I’m very pleased with it πŸ™‚ People always commend me for being so open and honest about myself, even online, and I can’t help it that’s who I am. What I’m about to share I’ve only told my family and very close friend. Why post it here on the blog for the world to read? Because for me it’s a major accomplishment in my life!

It’s no lie that I’m a big woman, I’ve been upfront about that with you all. As a big woman daily activities are difficult to do, even just standing at the bathroom sink to brush my teeth or brush my hair. I’m ashamed I let it get that bad, to where I couldn’t even stand for five minutes to brush, floss, and rinse. The pain in my lower legs was too much at times, the only way I could get through the process was to bring a folding chair in and sit down. Yesterday I was getting myself ready for morning church and when I got out of bed I noticed that there wasn’t any pain in my calves and my thighs weren’t aching. Even my lower back pain was barely there! At first I thought about dragging in my chair but then I decided you know what, I’m feeling good let’s see how this goes!

Know what?! For the first time in 2 years I stood at the sink and brushed my teeth along with my other routine and didn’t feel the first ache! Got to church stood and talked with a sweet friend for 5 minutes or so and didn’t feel like I needed to sit down. I moved around for for the fellowship time with ease but by there time the invitation came I could feel the muscles in the backs of thighs quivering. Not wanting to overdo it I remained in my seat and took it easy for the rest of the day. I know most folks who will read this will go, so what? However, for anyone else out there who knows and understands the struggle this is a major deal! Mobility is a big deal in everyone’s life, the lack of mobility can spell numerous health issues, one major one being the heart. Living a sedentary life can put so much strain on the heart leading to coronary heart disease. Not to mention high blood pressure, which that tends to run in my family.

I’ve only just begun, last week I don’t feel like I did enough in the way of exercise to warrant 1.5 pound loss but apparently I did. I am so thankful to the private fitness and health group I’ve joined with the mini challenges that I figured I wouldn’t be able to do. Such as walking for 10 minutes…I even gave myself one of walking up and down the stairs for 10 minutes. As I said in the group, my legs were like jello afterwards. Even the day after it felt like I was a snail that was trying to crawl through peanut butter. Every step was brutal, painful, my back screamed in agony but it wasn’t nearly as bad as it was not being able to move around period.

trying to think of a proper segue into the recipe and my mind is going blank! I did suffer from a sweet tooth this past week though. I was craving something major but didn’t want to blow my progress. That’s when I came up with the following dessert, just something I put together Saturday that really hit the spot!

IMG_0054

Triple Berry Bake

Serves: 6-8
Prep Time: 2-3 minutes
Bake Time: 20-30 minutes

3 cups frozen triple berry mix(or you can use fresh if it’s in season)
1/4-1/2 cup granulated Stevia in the raw(I used less for a more tart flavor)
1 cup almond flour
2 Tblsp granulated Stevia in the raw
2 Tblsp raw organic coconut oil

Preheat oven to 350*F. Add your frozen berries to an 8×8 baking dish. I didn’t prep my glass pan but if you feel led to do so then by all means use whatever you like. But quite honestly nothing is needed.
Sprinkle the granulated Stevia over the berries and set aside. In a small bowl combing the almond flour, granulated Stevia and coconut oil. You could add sliced almonds or chopped walnuts to the topping for more of a crunch. Disperse the topping evenly over the berries. Bake for 20-30 minutes until lightly browned on top. Serve warm or cold(I prefer cold, the topping hardens up because of the coconut oil and makes for a scrumptious breakfast alternative).

IMG_0064 Β  Β  IMG_0066

Now some folks may wish to add homemade whipped cream on top. This is delicious either way. I know for a strict candida diet I’m not technically supposed to have dairy, but I couldn’t resist. This was the only dairy I had had all day and didn’t suffer from it, as in I didn’t itch afterwards.

The nutritional counts for this are as follows for one serving(minus whipped cream) :

Calories: 192
Fat: 14g
Carbs: 15g
Dietary Fiber: 5g
Net Carbs: 5g
Protein: 5g

The more you add to this recipe then the nutritional value changes, just be mindful of that. I personally loved this concoction, my Dad wasn’t too thrilled with the topping but he loved the tart berries. He’s used to brown sugar, nuts, cinnamon and granola for toppings which tend to crisp up. While this topping didn’t get crispy, when eaten with the homemade whipped cream it was a nice layer of flavor. But like I said I like eating it when it’s cold and without whipped cream.

Hope you all enjoy and have a blessed day!!

And it begins…

Today is the day that I start my 8 weeks fitness and health challenge. When I first joined I thought yeah I’ll just see what I can do. But with recent health issues I’ve had to get serious about these changes and last week I decided that since I joined this challenge then I need to give it all that I possibly could. I’ll spare you all my specs(weight and measurements), it’s enough I’ve had to submit them to my friend who is in charge of this challenge πŸ™‚

However, I will be sharing pictures of what I am eating, since I’m doing a lower carb candida diet, and other little changes that I’m making along the way. Will see what comes of this!

So, far the day has been good. First order of business was my weigh in and measurements. Followed closely by lemon water, breakfast and supplements, and finished it off with a single cup of coffee. I’ll just be honest, I’m not a breakfast person at all, at the moment I still feel full and will see about modifying my meals the rest of the day. I’m not adding snacks or eating six smaller meals. I did that once and nearly made myself sick, I’m just sticking with three regular meals, if and only IF I feel the slightest inclination to indulge I might have a low carb/gluten-free dessert.

What was my breakfast this morning? Very simple, eggs over easy with sliced ham. Hindsight is telling me that was too much for Monday breakfast, especially when I’m not used to eating breakfast to begin with.

9bbb0426-70bf-4291-b44e-856283eeae2a

Candida diet…I’ve had to do A LOT of reading about it last week, especially about what I can and cannot have. Was I recently tested to be a candida sufferer? No, I can’t afford such tests. I am however suffering from candida die off and I have all the classic symptoms for it. A lot of what the diet suggests, especially in the realm of gluten-free, I cannot have solely based on carbohydrates alone. Dad and I were standing in Kroger last night looking for almond flour/meal because it along with coconut flour are my only replacements to flour. Very limiting. But I’m very familiar with both and have several recipes tucked away for those mornings when I want to break away from the eggs and ham routine.

What exactly can I have on the candida diet?

In truth, it’s a bunch of fresh whole foods. I’m limiting myself further by cutting out naturally sweet fruits and vegetables. Yeast, like cancer, needs sugar to thrive and survive. By eliminating refined and naturally occurring sugar I hope to reduce my symptoms over time. There is controversial information out there saying you can and cannot cure candida. I’m unsure which is correct at this time. If all I am able to do is lessen the effects then I’d be content with that. However, it has been my understanding that with such things, going more alkaline does help to cure a lot ailments(cancer included) when one eliminates all sugar.

For this week I have the fridge stocked with fresh veggies, limited dairy(only a little heavy cream for my coffee), frozen berries, and other pantry essentials such as extra virgin coconut oil, flax seeds, chia seeds(used sparingly), almond flour/meal, coconut flour, and stevia as my go to sweetener.

There is still so much more to share, but I’ll save it for the weeks to come πŸ™‚ Hope you all have a blessed day!!!